# React 进阶(4)-拆分 Redux-将 store,Reducer,action,actionTypes 独立管理
# 快速导航
# 前言
在前面的几小节中已经完成了一个todolist的添加,删除的操作,通过把组件的数据放到了Redux中的公共存储区域store中去存储,在Redux中进行状态数据的更新修改
改变store的数据唯一办法就是派发action,调用store.dispatch方法,也知道通过getState方法获取store中的所有状态数据,而实现组件页面的更新与store保持同步,必须得触发注册subscribe方法,通时还得监听一个事件处理函数
用于重新在一次获取store的数据使页面同步更新
在上几次编写Redux的代码中,创建store,reducer,acton,以及actionTypes(动作类型)都是放在一个文件当中进行编写的,然而更改store可能有多个action动作,所有代码杂糅在一起,后期维护起来显然是非常痛苦的
所以有必要进行将Redux代码进行按照特定的职责,功能结构进行拆分的,其实也就是把之前各个逻辑代码拆分到各个文件当中去单独管理的
你将在本文中学习到
- 如何拆分
action,以及actionType,封装成一个函数放到actionCreator中去管理 - 创建
reducer,以及store - 抽离容器组件
# 完整的 TodoList 代码
这是上一节完整的一todolist的代码,创建store,reducer,以及action,UI组件等都是混写在一个文件当中的,这样虽然没有什么问题,但是维护起来,非常痛苦
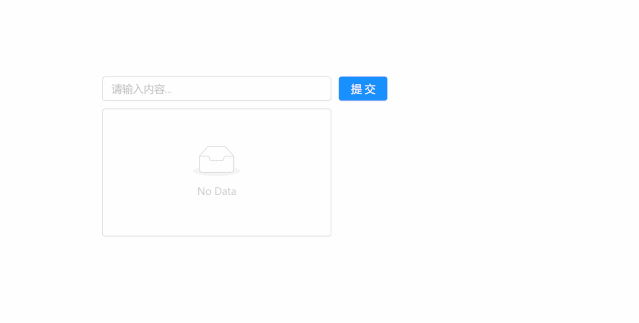
如果一个文件里代码行数超过了 130 行,就应该考虑拆分代码了的,当然这并不是硬性的规定,适当的拆分有利于代码的维护,但是过度的拆分,也会增加项目的复杂程度 实际效果如下所示:
具体的实例代码如下所示
import React from 'react';
import ReactDOM from 'react-dom';
import { Input, Button, List, message, Modal } from 'antd'; // 引入antd组件库
import 'antd/dist/antd.css'; // 引入antd样式

// 1. 创建一个store管理仓库,从redux库中引入一个createStore函数
import { createStore, applyMiddleware } from 'redux';
import { composeWithDevTools } from 'redux-devtools-extension';

// 2. 引入createStore后,store并没有创建,需要调用createStore()后才有store
//const store = createStore(reducer, window.__REDUX_DEVTOOLS_EXTENSION__ && window.__REDUX_DEVTOOLS_EXTENSION__()); // 创建好reducer后,需要将reducer作为参数传到createStore当中去,这样store才能拿到reducer的state数据
const store = createStore(reducer, composeWithDevTools(applyMiddleware())); // 创建好reducer后,需要将reducer作为参数传到createStore当中去,这样store才能拿到reducer的state数据

// 3. 创建reducer函数,管理组件共享的数据状态以及一些动作
// reducer是一个纯函数,返回一个新的state给store
// 4. 初始化state值,将原先组件内部的状态的数据,移除到reducer里面去管理
function reducer(
  state = {
    inputValue: '',
    list: [],
  },
  action
) {
  console.log(state, action);
  if (action.type === 'handle_Input_Change') {
    // 对原有的上一次的state做一次深拷贝,在Redux中,reducer不允许直接修改state
    // const newState = Object.assign({}, state);
    const newState = JSON.parse(JSON.stringify(state));
    newState.inputValue = action.value; // 将新的value值赋值给newState
    return newState;
  }
  if (action.type === 'addInputcontent') {
    const newState = JSON.parse(JSON.stringify(state));
    if (Trim(newState.inputValue) === '') {
      message.error('输入表单内不能为空,请输入内容');
    } else {
      newState.list.push(newState.inputValue); // 往list数组中添加input的内容
      newState.inputValue = '';
      return newState; // 返回newState
    }
  }
  if (action.type === 'deletelist') {
    // 下面这个也是拷贝原对象的一种方式与上面等价
    const newState = Object.assign({}, state);
    newState.list.splice(action.index, 1);
    return newState;
  }
  return state;
}

// 去除前后空格
function Trim(str) {
  return str.replace(/(^\s*)|(\s*$)/g, '');
}
const { confirm } = Modal;
// TodoList组件
class TodoList extends React.Component {
  constructor(props) {
    super(props);
    // 5. 在组件内部通过getState()方法就可以拿到store里面的数据
    this.state = store.getState();
    // this环境的绑定
    this.handleInputChange = this.handleInputChange.bind(this);
    this.handleStoreChange = this.handleStoreChange.bind(this);
    this.handleAddClick = this.handleAddClick.bind(this);
    // 触发订阅,让store感知到state的变化
    store.subscribe(this.handleStoreChange); // 接收一个函数,重新获取store最新的数据,subscribe里面必须接收一个函数,否则是会报错的,这个订阅函数放在componentWillMount生命周期函数内调用操作也是可以的
  }
  // componentWillMount(){
  // store.subscribe(this.handleStoreChange);
  // }
  // 组件卸载,移除时调用该函数,一般取消,清理已注册的订阅,定时器的清理,取消网络请求,在这里面操作
  componentWillUnmount() {
    store.unsubscribe(this.handleStoreChange);
  }

  render() {
    return (
      <div style={{ width: '600px', margin: '100px auto' }}>
        <div>
          <Input
            onChange={this.handleInputChange}
            value={this.state.inputValue}
            style={{ width: '300px', marginRight: '10px' }}
            placeholder="请输入内容..."
          />
          <Button type="primary" onClick={this.handleAddClick}>
            提交
          </Button>
        </div>
        <List
          style={{ width: '300px', marginTop: '10px' }}
          bordered
          dataSource={this.state.list}
          renderItem={(item, index) => (
            <List.Item onClick={this.handleDelList.bind(this, index, item)}>
              {item}
            </List.Item>
          )}
        />
      </div>
    );
  }

  handleInputChange(e) {
    console.log(e.target.value);
    // 定义action,确定一个操作,动作,注意action必须遵循一定的规范,是一个对象,type字段是确定要做的动作,类型,监听表单输入框的变化,value是输入框的值
    const action = {
      type: 'handle_Input_Change',
      value: e.target.value,
    };
    store.dispatch(action); // 通过store派发dispatch一个action,只有这里接收一个action,Reducer里面才能对新旧数据进行计算等操作
  }

  handleStoreChange() {
    console.log('handleStorechange,触发了');
    this.setState(store.getState()); // 触发setState重新获取store的数据,让input的数据与store保持同步了的
  }

  // 添加列表的操作
  handleAddClick() {
    console.log('添加按钮执行了');
    // 定义action动作
    const action = {
      type: 'addInputcontent',
    };
    store.dispatch(action); // 还要将action传递给dispatch,这样store才会接收到
  }

  // 删除列表操作
  handleDelList(index, item) {
    this.showDeleteConfirm(index, item);
  }

  showDeleteConfirm(index, item) {
    const action = {
      type: 'deletelist',
      index: index,
    };
    confirm({
      title: '确定要删除该列表?',
      content: item,
      okText: '确认',
      okType: 'danger',
      cancelText: '取消',
      onOk() {
        console.log('OK');
        store.dispatch(action);
      },
      onCancel() {
        console.log('Cancel');
      },
    });
  }
}
const container = document.getElementById('root');

ReactDOM.render(<TodoList />, container);
2
3
4
5
6
7
8
9
10
11
12
13
14
15
16
17
18
19
20
21
22
23
24
25
26
27
28
29
30
31
32
33
34
35
36
37
38
39
40
41
42
43
44
45
46
47
48
49
50
51
52
53
54
55
56
57
58
59
60
61
62
63
64
65
66
67
68
69
70
71
72
73
74
75
76
77
78
79
80
81
82
83
84
85
86
87
88
89
90
91
92
93
94
95
96
97
98
99
100
101
102
103
104
105
106
107
108
109
110
111
112
113
114
115
116
117
118
119
120
121
122
123
124
125
126
127
128
129
130
131
132
133
134
135
136
137
138
139
140
141
142
143
144
145
146
147
148
149
150
151
152
153
154
155
156
157
158
此时,项目的 src 根目下只有一个index.js文件,项目的目录树结构是这样的
D:\公开课\2019\React进阶\lesson2
├─split-redux
| ├─.gitignore
| ├─package-lock.json
| ├─package.json
| ├─README.md
| ├─yarn-error.log
| ├─yarn.lock
| ├─src
| | ├─index.js // Redux以及组件的业务逻辑都在一个文件里面
| ├─public
| | ├─favicon.ico
| | ├─index.html
| | └manifest.json
2
3
4
5
6
7
8
9
10
11
12
13
14
下面来一步一步拆分的,先从简单的入手,不断的简化代码的
# 拆分 ActionTypes 定义成一个常量,独立管理
改变store里面state数据,唯一的办法就是派发action,调用store.dispatch(action)方法
而定义action,它得是一个对象,该对象下type类型必须是一个字符串类型值,这个类型值必须和reducer里面action.type后面的值相同,如果不相等,控制台虽然不报错,但是却会影响实际的功能
代码如下所示
// 定义action,也就是具体要做的什么事情
const action = {
  type: 'handle_Input_Change', // 这个type后面的字符串值与在reducer里面的action.type相同
  value: e.target.value,
};
// 字符串类型值要与reducer相同
function reducer(state, action) {
  if (action.type === 'handle_Input_Change') {
    // 这个必须要与上面定义相同
    // 对原有的上一次的state做一次深拷贝,在Redux中,reducer不允许直接修改state
    // const newState = Object.assign({}, state);
    const newState = JSON.parse(JSON.stringify(state));
    newState.inputValue = action.value; // 将新的value值赋值给newState
    return newState;
  }
}
2
3
4
5
6
7
8
9
10
11
12
13
14
15
16
在根目录src下创建一个store文件夹,然后在新建一个actionsTypes.js
把上面action对象下的type的类型值定义成一个常量,然后对外暴露出去,因为这个动作 type 类型往往是固定的,一般不怎么去改变,类型值与常量名都定义成同名,这里的类型值与常量名设置成同名不一定非要一致,但是这已经是大家约定俗成的一种规定,是个良好的开发习惯
定义actionType类型如下所示,将 action 的 type 类型值定义成常量
const CHANGE_INPUT_VALUE = 'CHANGE_INPUT_VALUE'; // 字符串值是小写也是可以的

export { CHANGE_INPUT_VALUE };
2
3
然后在需要使用actionType类型处,引入该暴露的变量对象即可
import { CHANGE_INPUT_VALUE } from './store/actionTypes'; // 引入actionTypes类型

handleInputChange(e) {
        const action = {
            type: CHANGE_INPUT_VALUE, // 这里引入上面定义的变量对象
            value: e.target.value
        }
        store.dispatch(action); // 通过store派发dispatch一个action,只有这里接收一个action,Reducer里面才能对新旧数据进行计算等操作

    }
2
3
4
5
6
7
8
9
10
以此类推,按照以上模式把 action 里面的 type 类型值都更改成常量,放到一个文件(actionTypes.js)去管理的,这个文件只用于定义动作action类型的常量
因为上面的代码中的action有三个:所以完整的如下所示
const CHANGE_INPUT_VALUE = 'CHANGE_INPUT_VALUE'; // 监听input框输入值的常量
const ADD_INPUT_CONTENT = 'ADD_INPUT_CONTENT'; // 添加列表
const DELETE_LIST = 'DELETE_LIST'; // 删除列表

export { CHANGE_INPUT_VALUE, ADD_INPUT_CONTENT, DELETE_LIST };
2
3
4
5
然后在需要使用action Type的地方引用即可
import { CHANGE_INPUT_VALUE, ADD_INPUT_CONTENT, DELETE_LIST } from './store/actionTypes'; // 引入actionTypes
// 监听input变化动作
handleInputChange(e) {
        const action = {
            type: CHANGE_INPUT_VALUE,
            value: e.target.value
        }
        store.dispatch(action);

}

// 添加列表的操作
handleAddClick() {
    // 定义action动作
    const action = {
        type: ADD_INPUT_CONTENT
    }
    store.dispatch(action); // 还要将action传递给dispatch,这样store才会接收到
}

// 删除列表操作
    handleDelList(index,item) {
        this.showDeleteConfirm(index, item);
    }

    showDeleteConfirm(index,item) {
        const action = { // action在这里
            type: DELETE_LIST,
            index: index
        }
        confirm({
            title: '确定要删除该列表?',
            content: item,
            okText: '确认',
            okType: 'danger',
            cancelText: '取消',
            onOk() {
                console.log('OK');
                 store.dispatch(action);
            },
            onCancel() {
                console.log('Cancel');
            },
        });
    }
2
3
4
5
6
7
8
9
10
11
12
13
14
15
16
17
18
19
20
21
22
23
24
25
26
27
28
29
30
31
32
33
34
35
36
37
38
39
40
41
42
43
44
45
对于上面引入actionTypes,其实还有一种更简便的方法,actionTypes比较多的话,以下这种方式是比较方便的,通过*号一次性导入,起一个别名,然后通过对象的方式引入使用,这种方式在代码中也是比较常见的
import * as constants from './store/actionTypes'; // 通过*号全部引入,起一个变量名,引入actionTypes
// 监听input变化动作
handleInputChange(e) {
        const action = {
            type: constants.CHANGE_INPUT_VALUE,
            value: e.target.value
        }
        store.dispatch(action);

}

// 添加列表的操作
handleAddClick() {
    // 定义action动作
    const action = {
        type: constants.ADD_INPUT_CONTENT
    }
    store.dispatch(action); // 还要将action传递给dispatch,这样store才会接收到
}

// 删除列表操作
    handleDelList(index,item) {
        this.showDeleteConfirm(index, item);
    }

    showDeleteConfirm(index,item) {
        const action = { // action在这里
            type: constants.DELETE_LIST,
            index: index
        }
        confirm({
            title: '确定要删除该列表?',
            content: item,
            okText: '确认',
            okType: 'danger',
            cancelText: '取消',
            onOk() {
                console.log('OK');
                 store.dispatch(action);
            },
            onCancel() {
                console.log('Cancel');
            },
        });
    }
2
3
4
5
6
7
8
9
10
11
12
13
14
15
16
17
18
19
20
21
22
23
24
25
26
27
28
29
30
31
32
33
34
35
36
37
38
39
40
41
42
43
44
45
经过上面的处理,关于action的type类型值就已经拆分出去了的,至于拆分action中type类型值的好处就是,当你因为不小心把actionType拼写错误时,它会有很好的错误异常提示,这就是定义成一个常量的好处
# 拆分 action,将它封装到一个函数里面去管理
在上面的代码中,只是把action中的type类型值定义成一个常量然后拆分了出去的,但是仍然发现,代码并没有简化多少
其实在派发action之前,改变store的数据,对于action的动作(具体要做的事情),是不应该直接定义在我们的组件里,在事件处理函数里面定义 action 对象不是不可以。
但是这样代码的内聚性不高,对于简易的项目,一些action定义在各个组件内,也没有什么,但是一多的话,找起来就是灾难了的,不利于后续代码的维护
如果你能够把相应的action代码拆分出去,后来的同学一定会感谢你的,当然随之而然就是增加了点阅读代码的复杂度
如果你是高手,那绝对从内心上是要感谢那种把 action 拆分到一个文件里去管理的,至于初学者,那肯定觉得特么复杂的,非常绕以及难以理解的,其实只要把Redux的工作流程图理清楚了,也就自然为什么要这么拆分了的
通常来说,我们把上面的action都放在一个action Creators.js的文件中去管理的,管理这个action文件代码的名字并不是固定的,你想要怎么定义成管理action的任何一个名字都可以,但是最好是见名知意
具体actionCreators.js代码如下所示:
import {
  CHANGE_INPUT_VALUE,
  ADD_INPUT_CONTENT,
  DELETE_LIST,
} from './actionTypes'; // 引入actionTypes

// 将action封装成一个函数,用于返回type类型和需要的参数
function getInputChangeAction(value) {
  return {
    type: CHANGE_INPUT_VALUE,
    value: value,
  };
}

// 获取input框内容,添加列表action函数
function getAddInputContentAction() {
  return {
    type: ADD_INPUT_CONTENT,
  };
}

// 获取删除列表acton函数
function getDeleteListAction(index) {
  return {
    type: DELETE_LIST,
    index: index,
  };
}

// 上面的也等价于,在Es6中有简写函数的形式,与下面是等价的,在React代码中这种写法很常见
/*
const getInputChangeAction = (value) => ({
    type: CHANGE_INPUT_VALUE,
    value
});

const getAddInputContentAction = () => ({
    type: ADD_INPUT_CONTENT
})

const getDeleteListAction = index => ({ // 当只有一个参数时,圆括号可以省略,当返回值有多个时,外面需要用一个大括号包裹起来的
    type: DELETE_LIST,
    index
})

*/
// 将变量对象的函数给暴露出去
export { getInputChangeAction, getAddInputContentAction, getDeleteListAction };
2
3
4
5
6
7
8
9
10
11
12
13
14
15
16
17
18
19
20
21
22
23
24
25
26
27
28
29
30
31
32
33
34
35
36
37
38
39
40
41
42
43
44
45
46
47
48
在组件所需要引入actionCreactors的地方,引入actions,如下所示
import { getInputChangeAction, getAddInputContentAction, getDeleteListAction} from './store/actionCreators';


// 监听input操作
 handleInputChange(e) {
        const action = getInputChangeAction(e.target.value);
        store.dispatch(action);
 }

 // 添加操作
 handleAddClick() {
    const action = getAddInputContentAction();
    store.dispatch(action);
 }

 // 删除列表操作
    handleDelList(index,item) {
        this.showDeleteConfirm(index, item);
    }

    showDeleteConfirm(index,item) {
        const action = getDeleteListAction(index);
        confirm({
            title: '确定要删除该列表?',
            content: item,
            okText: '确认',
            okType: 'danger',
            cancelText: '取消',
            onOk() {
                console.log('OK');
                 store.dispatch(action);
            },
            onCancel() {
                console.log('Cancel');
            },
        });
    }
2
3
4
5
6
7
8
9
10
11
12
13
14
15
16
17
18
19
20
21
22
23
24
25
26
27
28
29
30
31
32
33
34
35
36
37
经过上面的action的拆分,现在看来我们的代码清晰多了,通过actionCreators来创建action,这是一个非常好的编程习惯,当然如果过度的拆分,就难免会让人觉得项目复杂,在各个文件之间来回切来切去的,如果不清晰他们之间的关系,那么的确是比较绕,但是不能因为这样,就不做拆分的
从长远来看,拆分action是很有必要的,一是将事件动作的类型定义成常量给分离出去,二是把整体action单独封装成一个函数放在一个单独的文件中进行管理的,它返回对应的类型和必要的参数的
拆分的目的主要是提高代码的可维护性
# 创建 store 单独管理
在上面的代码中,已经解决了Redux工作流程中的右半边部分,也就是做了action的拆分管理,那么接下来是整理store和reducer以及React Component了
在store文件夹中创建一个index.js的文件
这个index.js主要用于创建store
import { createStore } from 'redux';
// 创建store,调用createStore函数
const store = createStore();

export default store;
2
3
4
5
# 创建 reducer,更新 state 数据操作
在store文件夹下创建reducer.js文件,主要用于更新state数据操作,如下代码所示
import { message } from 'antd';
import {
  CHANGE_INPUT_VALUE,
  ADD_INPUT_CONTENT,
  DELETE_LIST,
} from './actionTypes';
const defaultStatus = {
  // 默认初始值
  inputValue: 'itclanCoder',
  list: ['川川', '111', '222'],
};
function reducer(state = defaultStatus, action) {
  if (action.type === CHANGE_INPUT_VALUE) {
    const newState = JSON.parse(JSON.stringify(state));
    newState.inputValue = action.value;
    return newState;
  }

  if (action.type === ADD_INPUT_CONTENT) {
    const newState = JSON.parse(JSON.stringify(state));
    if (Trim(newState.inputValue) === '') {
      message.error('输入表单内不能为空,请输入内容');
    } else {
      newState.list.push(newState.inputValue); // 往list数组中添加input的内容
      newState.inputValue = '';
      return newState; // 返回newState
    }
  }

  if (action.type === DELETE_LIST) {
    const newState = JSON.parse(JSON.stringify(state));
    newState.list.splice(action.index, 1);
    return newState;
  }
  return state;
}

// 去除前后空格
function Trim(str) {
  return str.replace(/(^\s*)|(\s*$)/g, '');
}

export default reducer;
2
3
4
5
6
7
8
9
10
11
12
13
14
15
16
17
18
19
20
21
22
23
24
25
26
27
28
29
30
31
32
33
34
35
36
37
38
39
40
41
42
43
在创建好reducer后,一定把reducer放到createStore()函数当做参数给传进去,这样store才会真正存储reducer的数据,同时把store给暴露出去,如下store文件夹中index.js的代码
import { createStore, applyMiddleware } from 'redux';
import { composeWithDevTools } from 'redux-devtools-extension'; // 这个是redux-devtools调试工具
import reducer from './reducer'; // 引入reducer
// 创建store
const store = createStore(reducer, composeWithDevTools(applyMiddleware()));

export default store; // 导出store
2
3
4
5
6
7
最后在主入口文件index.js中引入store,全局进行使用的,如下代码所示
import React from 'react';
import ReactDOM from 'react-dom';
import { Input, Button, List, Modal } from 'antd'; // 引入antd组件库
import 'antd/dist/antd.css'; // 引入antd样式
import {
  getInputChangeAction,
  getAddInputContentAction,
  getDeleteListAction,
} from './store/actionCreators';
import store from './store/'; // 引入store

const { confirm } = Modal;
// TodoList组件
class TodoList extends React.Component {
  constructor(props) {
    super(props);
    // 5. 在组件内部通过getState()方法就可以拿到store里面的数据
    this.state = store.getState();
    // this环境的绑定
    this.handleInputChange = this.handleInputChange.bind(this);
    this.handleStoreChange = this.handleStoreChange.bind(this);
    this.handleAddClick = this.handleAddClick.bind(this);
    // 触发订阅,让store感知到state的变化
    store.subscribe(this.handleStoreChange); // 接收一个函数,重新获取store最新的数据,subscribe里面必须接收一个函数,否则是会报错的,这个订阅函数放在componentWillMount生命周期函数内调用操作也是可以的
  }
  // componentWillMount(){
  // store.subscribe(this.handleStoreChange);
  // }
  // 组件卸载,移除时调用该函数,一般取消,清理已注册的订阅,定时器的清理,取消网络请求,在这里面操作
  componentWillUnmount() {
    store.unsubscribe(this.handleStoreChange);
  }

  render() {
    return (
      <div style={{ width: '600px', margin: '100px auto' }}>
        <div>
          <Input
            onChange={this.handleInputChange}
            value={this.state.inputValue}
            style={{ width: '300px', marginRight: '10px' }}
            placeholder="请输入内容..."
          />
          <Button type="primary" onClick={this.handleAddClick}>
            提交
          </Button>
        </div>
        <List
          style={{ width: '300px', marginTop: '10px' }}
          bordered
          dataSource={this.state.list}
          renderItem={(item, index) => (
            <List.Item onClick={this.handleDelList.bind(this, index, item)}>
              {item}
            </List.Item>
          )}
        />
      </div>
    );
  }

  handleInputChange(e) {
    const action = getInputChangeAction(e.target.value);
    store.dispatch(action);
  }

  handleStoreChange() {
    console.log('handleStorechange,触发了');
    this.setState(store.getState()); // 触发setState重新获取store的数据,让input的数据与store保持同步了的
  }

  // 添加列表的操作
  handleAddClick() {
    const action = getAddInputContentAction();
    store.dispatch(action);
  }

  // 删除列表操作
  handleDelList(index, item) {
    this.showDeleteConfirm(index, item);
  }

  showDeleteConfirm(index, item) {
    const action = getDeleteListAction(index);
    confirm({
      title: '确定要删除该列表?',
      content: item,
      okText: '确认',
      okType: 'danger',
      cancelText: '取消',
      onOk() {
        console.log('OK');
        store.dispatch(action);
      },
      onCancel() {
        console.log('Cancel');
      },
    });
  }
}
const container = document.getElementById('root');

ReactDOM.render(<TodoList />, container);
2
3
4
5
6
7
8
9
10
11
12
13
14
15
16
17
18
19
20
21
22
23
24
25
26
27
28
29
30
31
32
33
34
35
36
37
38
39
40
41
42
43
44
45
46
47
48
49
50
51
52
53
54
55
56
57
58
59
60
61
62
63
64
65
66
67
68
69
70
71
72
73
74
75
76
77
78
79
80
81
82
83
84
85
86
87
88
89
90
91
92
93
94
95
96
97
98
99
100
101
102
103
上面的代码是渲染一个todolist组件的功能,显然对于主入口文件,我们仍希望它是比较干净的
我们继续将 todolist 组件单独的抽离出去的
# 抽离容器组件
对于todolist就是一个简单的组件,那么我们可以把它抽离出去单独定义的,在根目录src下创建一个views文件夹,这个文件夹可以放我们的视图组件,在里面建一个TodoList.js的文件的 具体代码如下所示:
对于下面用类class定义声明的TodoList组件,称作为一个容器组件,之所以这么叫,是因为在这个组件里面包含很多业务逻辑,例如:this坏境的绑定,生命周期函数,以及一些事件处理函数等,负责整个业务功能组件的逻辑实现,也有人叫它聪明组件的,这个只是个称呼而已,没有褒贬之义 如下代码所示
import React from 'react';
import { Input, Button, List, Modal } from 'antd'; // 引入antd组件库
import 'antd/dist/antd.css'; // 引入antd样式
import {
  getInputChangeAction,
  getAddInputContentAction,
  getDeleteListAction,
} from '../store/actionCreators';
import store from '../store/index'; // 引入store

const { confirm } = Modal;
// TodoList组件
class TodoList extends React.Component {
  constructor(props) {
    super(props);
    // 5. 在组件内部通过getState()方法就可以拿到store里面的数据
    this.state = store.getState();
    // this环境的绑定
    this.handleInputChange = this.handleInputChange.bind(this);
    this.handleStoreChange = this.handleStoreChange.bind(this);
    this.handleAddClick = this.handleAddClick.bind(this);
    // 触发订阅,让store感知到state的变化
    store.subscribe(this.handleStoreChange); // 接收一个函数,重新获取store最新的数据,subscribe里面必须接收一个函数,否则是会报错的,这个订阅函数放在componentWillMount生命周期函数内调用操作也是可以的
  }
  // componentWillMount(){
  // store.subscribe(this.handleStoreChange);
  // }
  // 组件卸载,移除时调用该函数,一般取消,清理已注册的订阅,定时器的清理,取消网络请求,在这里面操作
  componentWillUnmount() {
    store.unsubscribe(this.handleStoreChange);
  }

  render() {
    return (
      <div style={{ width: '600px', margin: '100px auto' }}>
        <div>
          <Input
            onChange={this.handleInputChange}
            value={this.state.inputValue}
            style={{ width: '300px', marginRight: '10px' }}
            placeholder="请输入内容..."
          />
          <Button type="primary" onClick={this.handleAddClick}>
            提交
          </Button>
        </div>
        <List
          style={{ width: '300px', marginTop: '10px' }}
          bordered
          dataSource={this.state.list}
          renderItem={(item, index) => (
            <List.Item onClick={this.handleDelList.bind(this, index, item)}>
              {item}
            </List.Item>
          )}
        />
      </div>
    );
  }

  handleInputChange(e) {
    const action = getInputChangeAction(e.target.value);
    store.dispatch(action);
  }

  handleStoreChange() {
    console.log('handleStorechange,触发了');
    this.setState(store.getState()); // 触发setState重新获取store的数据,让input的数据与store保持同步了的
  }

  // 添加列表的操作
  handleAddClick() {
    const action = getAddInputContentAction();
    store.dispatch(action);
  }

  // 删除列表操作
  handleDelList(index, item) {
    this.showDeleteConfirm(index, item);
  }

  showDeleteConfirm(index, item) {
    const action = getDeleteListAction(index);
    confirm({
      title: '确定要删除该列表?',
      content: item,
      okText: '确认',
      okType: 'danger',
      cancelText: '取消',
      onOk() {
        console.log('OK');
        store.dispatch(action);
      },
      onCancel() {
        console.log('Cancel');
      },
    });
  }
}

export default TodoList;
2
3
4
5
6
7
8
9
10
11
12
13
14
15
16
17
18
19
20
21
22
23
24
25
26
27
28
29
30
31
32
33
34
35
36
37
38
39
40
41
42
43
44
45
46
47
48
49
50
51
52
53
54
55
56
57
58
59
60
61
62
63
64
65
66
67
68
69
70
71
72
73
74
75
76
77
78
79
80
81
82
83
84
85
86
87
88
89
90
91
92
93
94
95
96
97
98
99
100
101
其实没有做多大的代码改变,只是把原先的代码挪到另一个文件管理了的,那么现在的项目目录结构是这样的
D:\公开课\2019\React进阶\lesson2
├─split-redux
| ├─.gitignore
| ├─package-lock.json
| ├─package.json
| ├─README.md
| ├─yarn-error.log
| ├─yarn.lock
| ├─src
| | ├─index.js // 主入口文件
| | ├─views
| | | └TodoList.js // 容器组件
| | ├─store // 组件的数据
| | | ├─actionCreators.js // action创建者
| | | ├─actionTypes.js // actionType的类型,定义成的常量
| | | ├─index.js // 创建的store主文件
| | | └reducer.js // 创建的reducer
| ├─public
| | ├─favicon.ico
| | ├─index.html
| | └manifest.json
2
3
4
5
6
7
8
9
10
11
12
13
14
15
16
17
18
19
20
21
从这个目录树中,非常清楚了的,由起初在index.js的代码,把redux中的store,reducer,action逐渐剥离出去单独管理了的
# 结语
本小节主要是对上一节代码的拆分,将Redux中的store,action,以及reducer分离开来,各自独立的管理,职责分明,如果项目比较简单,一开始是可以写在一块的,然后一点的拆分出去的
如果不是老司机,一开始一上来就拆分,如果对Redux的工作流程不是很清晰,难免会有所懵逼,发现,写着,写着,找不到头绪,不知道自己在写些什么的
在实际开发当中,至于拆分的顺序,不一定按照我这种方式的,合适的流程应当时,先创建store,然后在创建reducer,确定要做什么事情,编写action,拆分action代码,其中获取store就用getState方法,而更改store就要通过dispatch派发action,这个流程是固定的
要理解 Store 是用来存储组件的公共数据状态的,它就是一个把 Reducer 关联到一起的一个对象,而 Reducer 就是根据 Action 发出的 type(动作类型)来做某些事情
当然这个代码仍然优化的地方,我们在后续当中,仍会进一步的拆分的
 分享
分享
 留言
留言
 解答
解答
 收藏
收藏